Tutorials

Origami slippers

Tutorial on how to make origami slippers.

You will need:
– 7. 5 x 15 cm sheet of paper. 20180418_141016

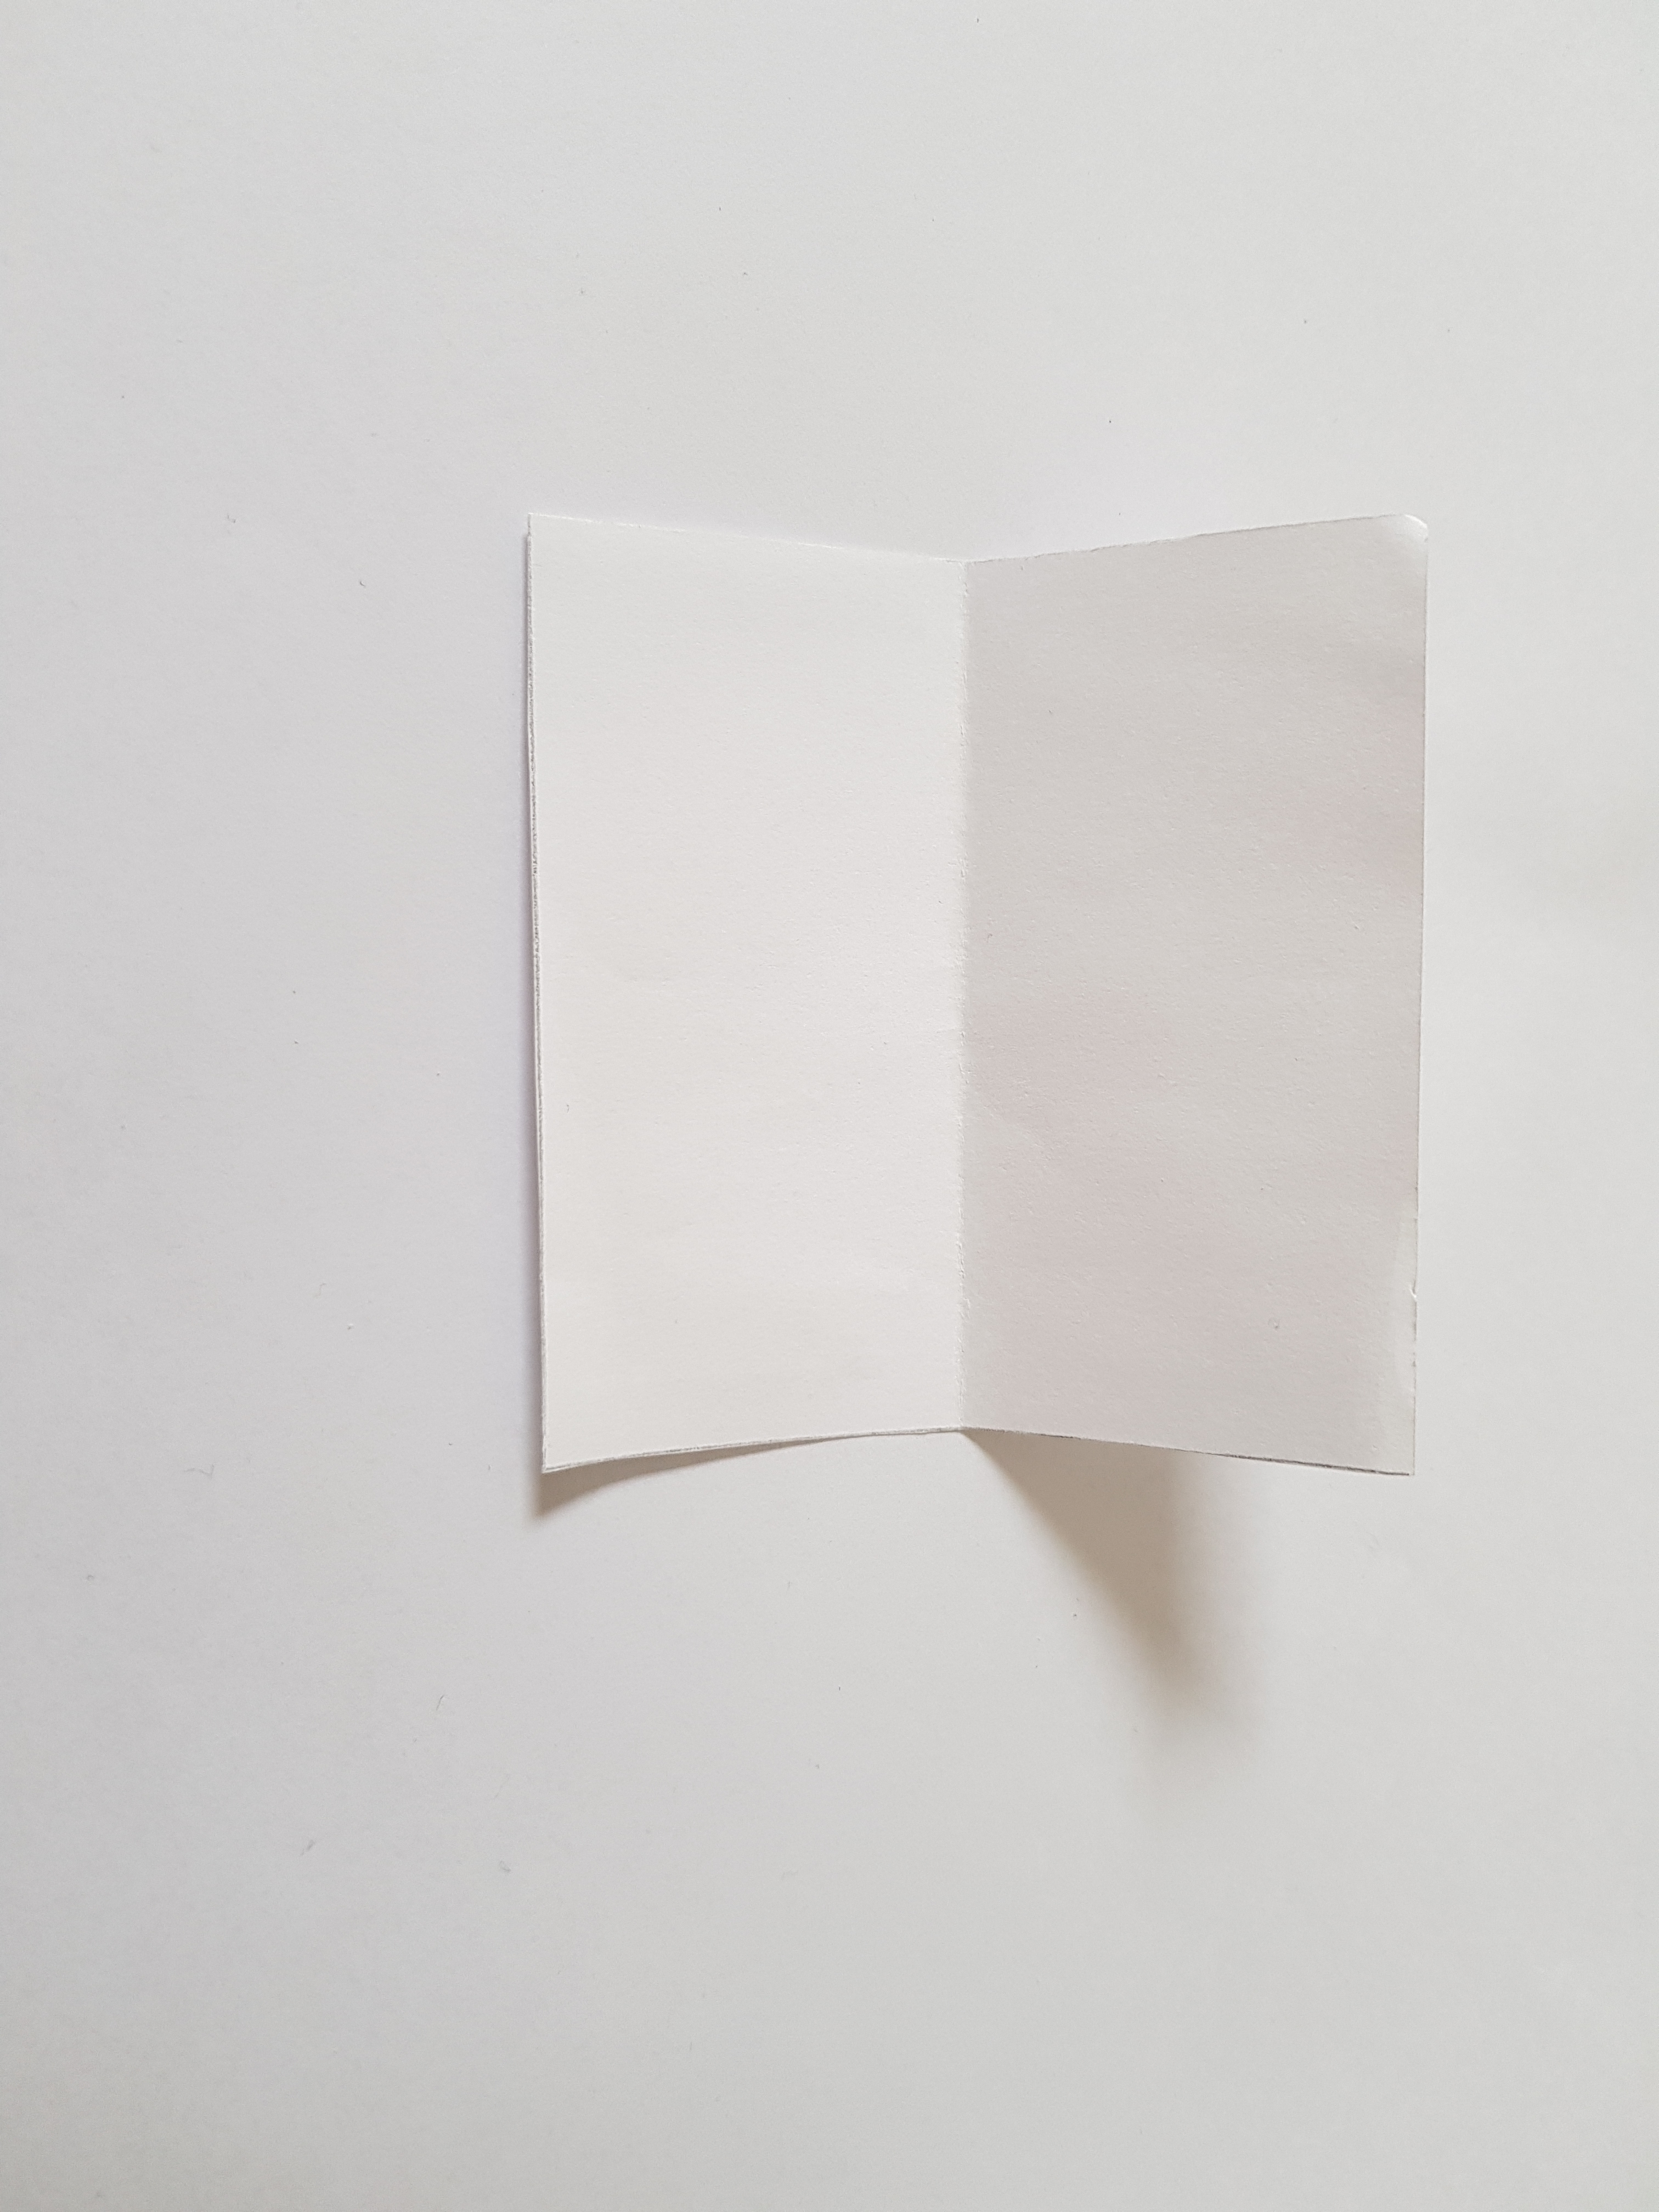
1. Colored side up. Start by folding like the picture shown below. 20180418_140958.jpg

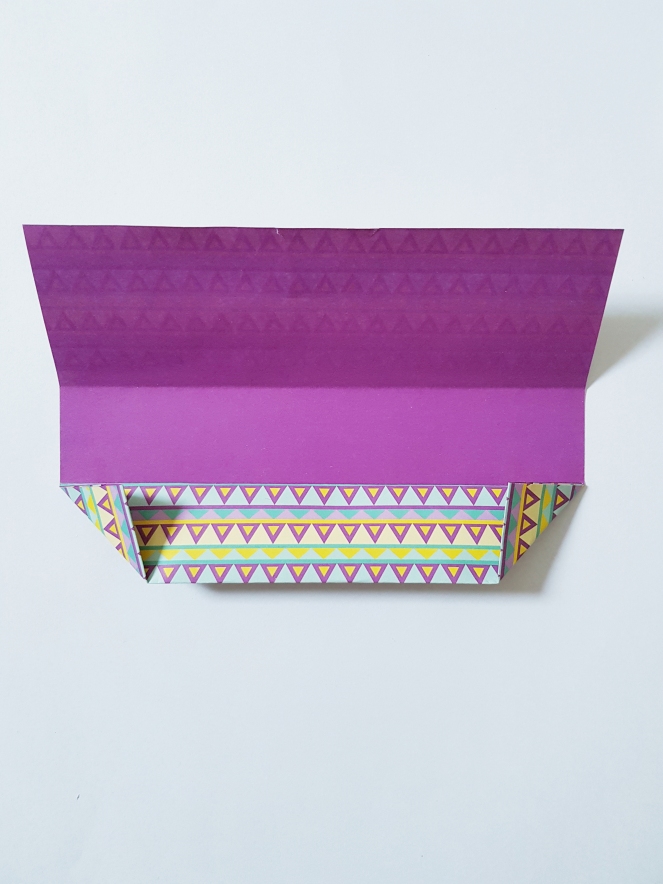
2. Turn over and fold like this.20180418_141029

3. Turn over again and fold it in half. 20180418_141044

4. Fold the right edge over the edge you did on step 4.20180418_141055

5. Unfold the right edge.20180418_141106

6. Open the left flap and press down.


7. Fold the right edge again to the left and do the same as step 6.
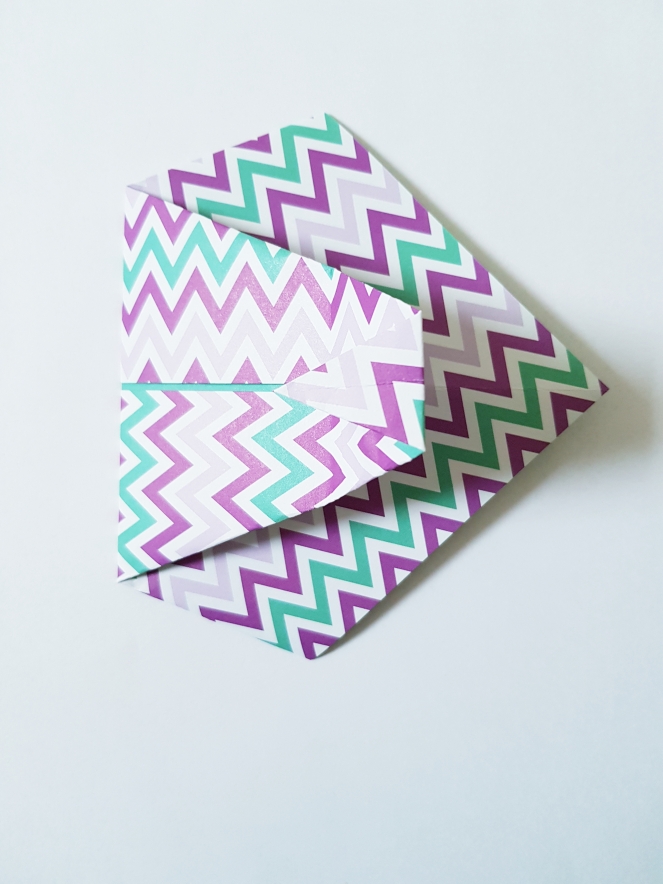
20180418_141156

8. Fold like this.20180418_141205

9. Put the flap inside.20180418_141228

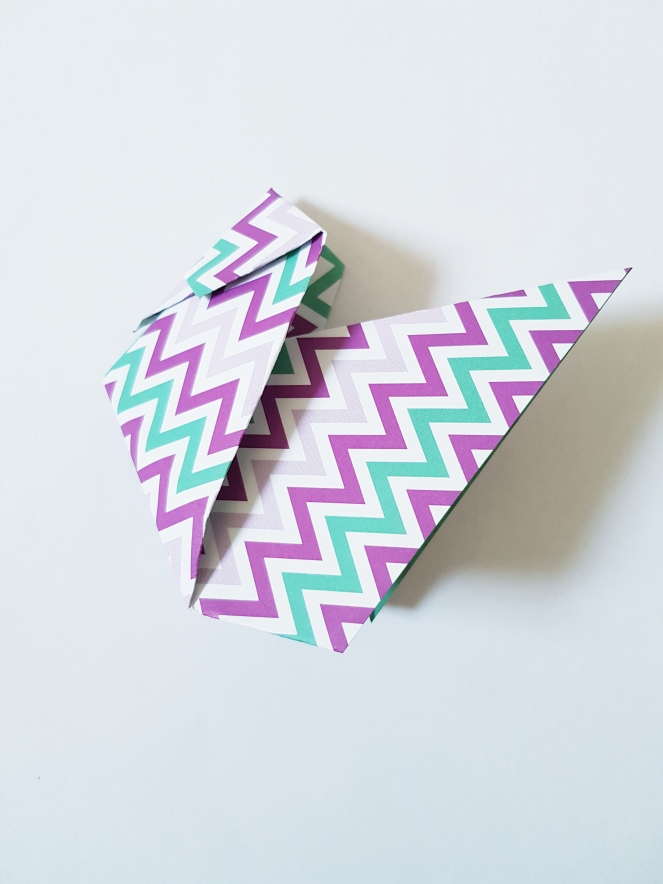
10. Form the slipper with your fingers and then its done.20180418_141259

Final results!20180418_14134920180418_14135920180418_14151320180418_141533

Tutorials

Origami envelope

Tutorial on how to make an easy origami envelope.

You will need:
– 1 sheet of square paper.20180415_135151.jpg

1. Colored side up. Start by folding the paper in half.20180415_135410

2. Fold the bottom edge into the centre, crease and unfold. 20180415_135419

3. Fold to the new crease that were made.20180415_135428

4. Fold the edge to the centre.  20180415_135438

5. Fold down the upper edge to the crease and unfold.
20180415_135448

6. Fold the bottom corners. 20180415_135512

7. Fold the side edges like this.20180415_135537

8. Fold the upper corners into the centre and then close it. 20180415_135555

Finished!origami_envelope_done.jpg

20180327_145839.jpg

Tutorials

Origami star box

Tutorial on how to make a origami star box.

You will need:
– 1 sheet of square paper20180415_134736
1.
White side up. Fold the paper diagonally and in half both directions.


2. Bring the horizontal diagonal flaps to the centre so the model forms like a square and flatten.


3. 
Fold the paper like this. Turn the model over and repeat.


4. Open the flaps and flatten. Turn the model over and repeat again.


5. Rotate the model. Fold the outer edges to the opposite direction and stick the edges under the upper layers. Turn over and repeat.


6. Fold like this.20180415_135106

7. Fold down all the flaps and form it like a box.20180415_135122

Final results:origamistarbox_done.jpg

Tutorials

Origami gift bow

Tutorial on how to make an origami gift bow. Few steps to fold and is perfect for beginners.

You will need:
– 1 sheet of square paper.
20180415_135151.jpg

1. Begin with the white side up. Fold diagonally in both directions
20180415_135234.jpg

2. Fold all corners into the centre.
20180415_135244.jpg

3. Fold the new corners into the center again.
20180415_135256.jpg

4. Turn over and fold all corners into the centre.
20180415_135306.jpg

5. Fold each of the triangles as shown below.20180415_135322

6. Turn the model over and fold out the centre triangles again. They should stand upright.
20180415_135334

7. Fold the very centre triangles to stand up also.
20180415_135343

There you have your origami gift bow.


giftbow_done[1].jpg

Tutorials

Origami duck

Tutorial on how to make an origami duck. The duck is easy to make and is beginner friendly.

You will need:
– 15 x 15 paper
20180414_121317

1. Begin with the white side up. 20180414_121335

2. Fold like this and then unfold.20180414_121345

3. 20180414_121404

5. Turn the model over and make a valley fold to the edge.20180414_121435

6.
20180414_121444

7.
20180414_121503

8.
20180414_121513

9.20180414_121523

10. Mountain-fold the model in half like the picture below.20180414_121533

11. Pivot the head and neck assembly up to an angle of about 45 degrees and flatten the model.20180414_121544

12. Pivot the head before you flatten the model.20180414_121553

13.20180414_121602

Then your done! There you have your origami duck.
20180414_121614.jpg

20180311_141348.jpg


Tutorials

DIY heart sticks

These cute heart sticks are perfect as party decorations.

You will need:
– popsicle sticks
– glue
– 7 x 7 cm paper
– a brush
– acrylic paint
– tape

Start to fold the origami hearts by following these steps:

1.
20180306_111106.jpg

20180306_111123.jpg

2. 20180306_111154.jpg

20180306_111201.jpg

3.
20180306_111221.jpg

4. Turn over and fold like this:
20180306_111324.jpg

5. Turn over and fold like this:
20180306_111350.jpg

6. 20180306_111447.jpg

7.
20180306_111513.jpg

20180306_111535.jpg

8.
20180306_111619.jpg

9. 20180306_111647.jpg

10. 20180306_111647.jpg

11.
20180306_111735.jpg

20180306_111752.jpg

12.
20180306_111818.jpg

13.
20180306_111833.jpg

20180306_134111.jpg

14.
Tape the popsicle stick like the picture and then paint the popsicle stick with the color you desire.
20180306_112803.jpg

20180306_132228.jpg

15. Remove the tape
20180306_133931.jpg

16. Glue the heart onto the popsicle stick.
20180306_135503.jpg

17. Final results:
instapinterest.jpg

Tutorials

DIY DIAMOND BOX

How to create your own bling diamond box:

You will need:                                                                             collagediamondbox

  • a gift box
  • silver paint
  • a large flat brush
  • rhinestone mesh
  • glue
  • small mirror stickers
  • scissors


1. Start to paint the gift box with the desired color. Paint three layers for full coverage. Allow it to dry every time you paint a new layer.

IMG_20180201_135916.jpg


2. Wrap the rhinestone mesh around the box and cut the length you want.
Then glue the rhinestone mesh onto the sides of the box.
IMG_20180228_133736.jpg


3. Place the mirror stickers in the middle of the box. Then glue the rhinestone mesh around the mirrors. Allow it to dry.

IMG_20180228_133829.jpg


4. Final results. You got your bling box ready to be used!

IMG_20180227_150749.jpg